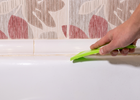
How to Remove Silicone From Tiles
, by Initial Tiles, 8 min reading time

, by Initial Tiles, 8 min reading time
Silicone, a versatile household material renowned for sealing gaps and joints, plays a pivotal role in maintaining the integrity of Sydney's floor and outdoor tiles. While it serves admirably in preserving the structural integrity of these tiles, the passage of time can render silicone unsightly, prompting the need for its removal.
Whether gearing up for a comprehensive renovation or simply aiming to rejuvenate your space's aesthetics, eliminating silicone from floor tiles and outdoor tiles in Sydney can be approached with ease by employing the right tools and techniques. This guide delves into a step-by-step procedure to efficiently remove silicone, ensuring your tiles regain their pristine appearance. Get ready to transform your living spaces by bidding farewell to unwanted silicone and welcoming a refreshed ambience.
When it comes to the removal of silicone from your floor tiles or outdoor tiles in Sydney, it demands a comprehensive array of tools. Equip yourself with the essentials to streamline the process effectively:
It's time to soften the silicone adorning your Sydney floor tiles or outdoor tiles by transitioning seamlessly to the next phase. Adhering to the manufacturer's guidelines, apply the chosen silicone sealant remover methodically. This meticulous application initiates a softening process, rendering the silicone more amenable to removal.
Ensure a uniform coating by spreading the remover evenly over the silicone-laden areas of your floor and outdoor tiles. This optimises the product's effectiveness and guarantees comprehensive coverage, leaving no trace of stubborn silicone.
Allow the silicone sealant remover to permeate the tiled surface, granting it the requisite time as per the manufacturer's recommendations. This strategic waiting period ensures the silicone softens adequately, simplifying the subsequent steps in the removal process. By following these guidelines diligently, you set the stage for a seamless and efficient transformation of your floor and outdoor tiles in Sydney.
With the silicone now softened, it's time to proceed with finesse on your floor tiles or outdoor tiles in Sydney. Employ a sharp utility knife, ensuring a meticulous approach as you delicately cut along the edges of the softened silicone. Begin by lifting the edge with the knife, establishing a starting point that minimises the risk of damage to your precious tiles.
Take ample time during this phase, prioritising a cautious demeanour to avoid inadvertent scratches on your floor and outdoor tiles. Opt for a systematic approach by working in manageable sections, methodically cutting away the softened silicone as you progress. This measured technique ensures the thorough removal of silicone residues. It safeguards the aesthetic appeal and structural integrity of your floor and outdoor tiles in Sydney.
The next crucial step involves meticulous residue removal from your floor tiles or outdoor tiles in Sydney by adeptly removing the majority of softened silicone. Employ a plastic scraper to ensure a gentle touch to safeguard the tiles' pristine surfaces. Hold the scraper at a slight angle to prevent any inadvertent scratches during the removal process.
In the event stubborn spots persist, demonstrating resilience and employing a strategic approach is crucial. Apply a small amount of silicone grout sealant remover to the lingering residues, allowing it to work its magic. Resume scraping, ensuring persistent residues succumb to the combined efforts of the remover and the plastic scraper. This meticulous process guarantees the elimination of silicone remnants, leaving your floor and outdoor tiles in Sydney looking rejuvenated and flawlessly clean.
As the silicone remnants have been diligently removed, the spotlight now shifts to restoring the immaculate shine of your floor tiles and outdoor tiles in Sydney. Utilise old towels or rags for a thorough wipe-down, eliminating any residual traces of silicone and cleaner residue.
This pivotal step ensures the tiles achieve pristine cleanliness, creating an ideal canvas for applying new sealant. The meticulous cleaning process enhances the visual appeal of your floor and outdoor tiles. It sets the stage for optimal adhesion of the upcoming sealant layer.
Exercise diligence during this phase to guarantee every nook and cranny of your tiles in Sydney is free from any lingering residues. With a refreshed and spotless surface, your floor and outdoor tiles are now poised for the final touch – a rejuvenating application of new sealant to protect and enhance their natural beauty.
In some cases, especially if the silicone layer is thick or old, you may need to repeat the process to ensure complete removal. Be patient and thorough to achieve the best results.
Removing silicone from floor and outdoor tiles in Sydney doesn't have to be a daunting task. With the right tools and a methodical approach, you can restore the beauty of your old tiles and prepare them for a fresh sealant application. Always remember to take your time, follow each step carefully and prioritise the health of your tiles throughout the process.
Are you looking to revitalise your tiles or need quality tiles for your project in Sydney? Look no further than Initial Tiles & Bathware! Our expert team specialises in a wide range of premium floor and outdoor tiles in Sydney. Visit our showroom now to explore our extensive collection and discover how we can elevate your space. Contact us for personalised assistance and unbeatable tile solutions. Your dream tiles are just a step away!