The 8 Worst Tiling Mistakes You Should Avoid
, by Initial Tiles, 8 min reading time
, by Initial Tiles, 8 min reading time
Giving your home a fresh look with tiling requires taking precautions to ensure the project's success. In this article, we'll be discussing eight common tiling mistakes that you should avoid at all costs in order to create a beautiful and lasting tile design. Read on to discover these costly tiling mistakes and how to avoid them.
When it comes to tiling, a few common mistakes can lead to big problems down the road. Here are eight of the worst tiling mistakes you should avoid:
Before you start any tile installation project, it's crucial to have a detailed plan in place. This includes accurately measuring the area to be tiled, choosing the right tiles and grout, and deciding on the layout and pattern of the tiles. Without proper planning, you might end up with a tile job that doesn't look the way you want it to, or you might not have enough materials to complete the project.
If the surface you're tiling isn't level, your tiles will be uneven, and the final result will look unprofessional. Before you start tiling, make sure to level the surface using a self-levelling compound or by installing a backer board. This will ensure that your tiles adhere correctly and are evenly spaced.
Different types of mortars are available for different types of tiles. Using the wrong type of mortar can cause the tiles to crack or come loose over time. It's essential to choose the right mortar for your tiles and make sure it's properly mixed and applied according to the manufacturer's instructions.
When spreading mortar, it's important not to use too much or too little. Using too much mortar can cause the tiles to sit too high, making them more susceptible to cracking. On the other hand, using too little mortar can cause the tiles to come loose over time. Apply just enough mortar to create a thin layer between the tile and the surface beneath it.
It's essential to decide on a tile pattern before you start laying tiles. If you don't plan ahead, you might end up with an uneven or haphazard look, which can be difficult to fix once the tiles are in place. Choose a pattern that works well with your space and tiles and lay out the tiles accordingly.
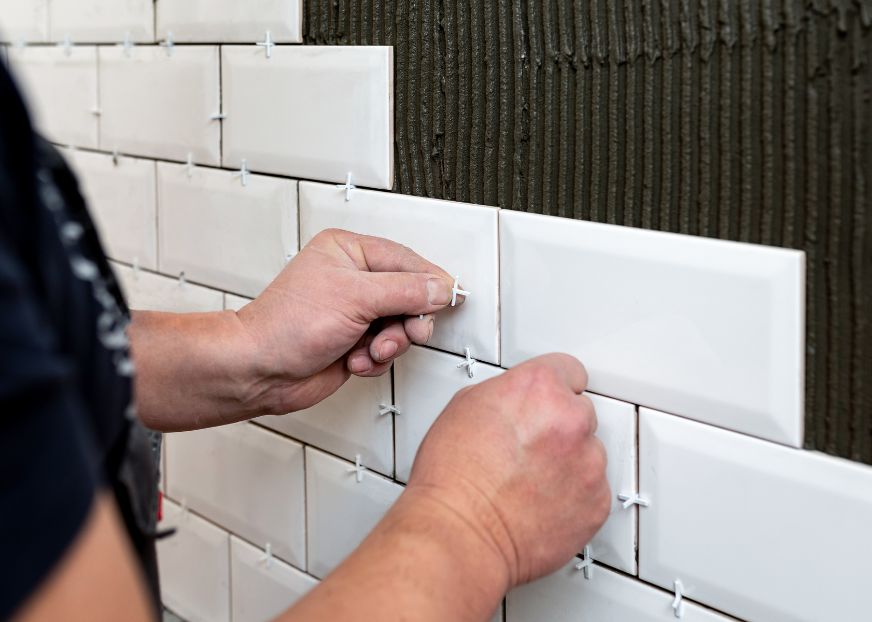
Spacers are essential for keeping your tiles evenly spaced and preventing them from shifting during installation. Without spacers, your tile job can look sloppy and unfinished. Make sure to use spacers of the correct size and place them at regular intervals between the tiles.
Before installing tiles, always clean them thoroughly with an appropriate cleaner and allow time to dry completely. Failing to do this can result in the dirt getting trapped beneath the tiles which can be a nightmare if you ever have to remove them!
Measuring once is never enough for tiling. Always measure twice (or even three times) before cutting any tiles. Otherwise, you risk ending up with pieces that are too small or too big for your space.
These eight mistakes are some of the most common when it comes to tiling projects. Avoiding them can help you achieve a beautiful and long-lasting tile job!
Installing tile is a popular home improvement project that most do-it-yourselfers can complete. Though it takes some time and effort, a well-executed tile installation can last for decades and achieve a high level of beauty and functionality in your home.
The first step in achieving perfect tile installation is preparation. Before you begin, take the time to calculate the amount of tile you'll need and purchase 10 per cent more to account for waste and breakage. Choose your tiles carefully, keeping in mind the location of the installation and the amount of traffic the area will see. Opt for durable, stain-resistant materials in high-traffic areas like kitchens and bathrooms.
Once you have your material selections made, it's time to prep the surface where the tile will be installed. This surface must be clean, dry, flat, and free of debris. If not adequately prepared, even the highest quality tiles can fail prematurely.
Three key steps to achieving a perfect tile installation are layout, measuring, and cutting. The layout is established by finding the centre of the surface area and drawing two perpendicular lines through it using a level and chalk line. Then, marks are made at equal distances from each reference line to create a guideline for tile placement.
Measuring involves finding the middle of each tile and marking the edges where they overlap with the layout lines. Cutting the tiles using various tools depending on the tile type, such as a wet saw for ceramic tiles or scoring wheels for larger ones. The tiles are adhered to using thin-set mortar, and grout is applied with a rubber float in a crisscross or circular pattern. You should remove excess grout with a damp sponge and let the tiles dry.
Properly installing tile is essential for achieving a beautiful and long-lasting result. Unfortunately, many common mistakes can cause issues and even require costly repairs. By understanding and avoiding the above-mentioned eight worst mistakes, you can ensure a successful tiling project that looks great and stands the test of time. With the right tips, solutions, and resources, you can avoid these mistakes and enjoy the benefits of a beautifully installed tile project. Click here to know about our services so that you can prevent these common tiling mistakes and achieve a beautiful, professional-looking tile installation today!